How to build a budget friendly homemade deadlift platform with band attachments.
If you want a pre-made platform, find it here on Amazon: https://amzn.to/2EQLhCO
Homemade Deadlift Platform – Materials Needed
-9 2″ x 4″ x8′ construction grade (or better) wood studs (6 uncut boards, 4 4′ sections, 2 2′ sections, and 4 1′ sections)
-1 2″x3″x8″ -2 4’x8′ x 1/2″ Sheets Plywood (cut into 3 2’x6′ sections, the 2’x4′ -sections will be used as the top of the platform that you’ll stand on)
-3 landscaping tiles (rubber) 16×16
-1 Box T-25 2 3/4 Deck Screws (get a bit if you don’t have one)
-1 Box 2inch finishing nails
OPTIONAL:
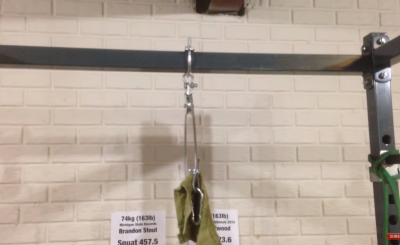
-4 U-bolt’s (4″ or longer, optional if you want to use bands, or to add later)
-2 320lb Carabiners (optional, if you want to attach bands)
-10 1″x3″x8′ pieces (optional, if you don’t want to use the plywood from above)
-Tall bottle wood glue
-Polyurethane finish (optional, there is a 2in1 that is used in the video)
Homemade Deadlift Platform – Instructions
Homemade Deadlift Platform – Phase 1
You will start with the 3 sections of plywood and glue them together. Clamp down or weigh down with weights once glue is applied to the plywood. If you haven’t glued wood before, it is similar to putting mustard on a sandwich. You don’t have to coat it but you do want a decent amount. The drying process can take several hours for the boards.
Homemade Deadlift Platform – Phase 2
From there you’ll set the 2′ sections of 2×4 on each end of the deadlift platform (approximately 8′ apart). Then, you’ll set 2 of the 4′ 2×4 sections inside of the 2′ section. Then, take the (hopefully cured) plywood that you glued together and set that in between the 2×4 sections you laid out. You should end with somewhat of an I shape.
Homemade Deadlift Platform – Phase 3
Now, you will start to lay the 8′ 2×4 and 1 2×3 on top. These should not gap further than the plywood (i.e. no lipping). You start at the front of the plywood and should finish even up on the backside of the plywood once they are laid out. You can apply glue to either the backside of the 2×4 or on top of the plywood as you lay each board. Doing so on the 2×4 makes it a little easier as you can coat the backside of the entire board. Weigh down the boards so that the glue cures properly.
Homemade Deadlift Platform – Phase 4
Take the 4 1′ sections of 2×4 and place along the inner 2×4 board that extends out from the platform (watch the video for proper placement if unsure). There are 4 places where these are to be laid and you’ll lay 1 2×4 1′ section onto each spot.
Homemade Deadlift Platform – Phase 5
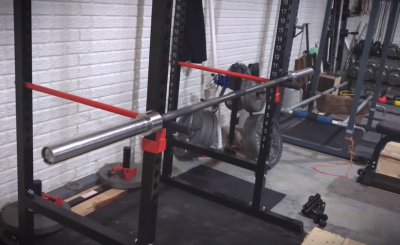
Take a landscaping tile and cut right down the center of the tile. Then take 1 whole landscape tile and the half you just cut and place on end of the deadlift platform. This will be where the barbell rests, so it is ideal to get out your barbell to make sure there is proper spacing. These will need to be nailed down to the platform to properly secure them.
Homemade Deadlift Platform – Phase 6
The final part are the holes for the u-bolts. You’ll need a drill bit that is slightly larger than the U-bolt. The U-bolt will end up roughly 2″ in on either end of the thickest 2×4 board (where you previously laid the 1′ 2×4 board). You’ll need to mark the U-bolt out on the board with a marker. Set the U-bolt next to the center (width wise) of the 2×4 to make your marks. Measuring the board width and marking the boards center width can be helpful to make sure the U-bolt is centered. Do this for all 4 areas.
Homemade Deadlift Platform – Phase 7
Then, you will need to drill straight down through the board in each marked spot. You will need to carefully lift up the deadlift platform to lean against a wall or solid surface (team lift is ideal to prevent injury). You will then counter sink the drilled area on the other side of the platform. The drill bit will need to be wider than the nut used for the U-bolt (drill in about 1″ on each of the 8 holes for theU-bolt). This is to make sure the nut is flush with the platform and doesn’t cause the platform to raise off the floor. Once drilled out you can return the platform back to the floor. You will want to use something to slightly elevate the platform so you can place the U-bolt in its hole followed by the nut underneath. Place all 4 U-bolts in each of their drilled out holes. I opted to glue the underside of each U-bolt area so the nut didn’t free up ever.
Homemade Deadlift Platform – Phase 8
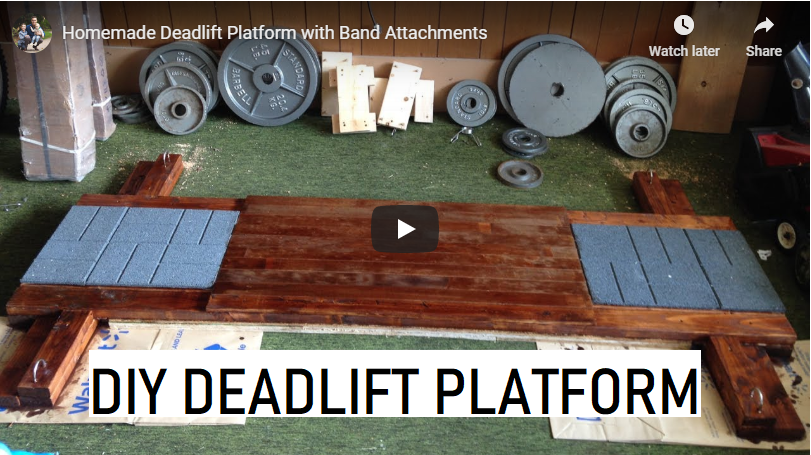
The final step is to coat the platform so that sweat doesn’t warp the boards as well as a moisture barrier for similar reasons. This is optional but can help ensure the platform lasts.
As always proceed with caution and take your time during the building process.
For more how to project’s, click here.
Facebook: http://facebook.com/LiftingDad
Instagram: http://instagram.com/LiftingDad